
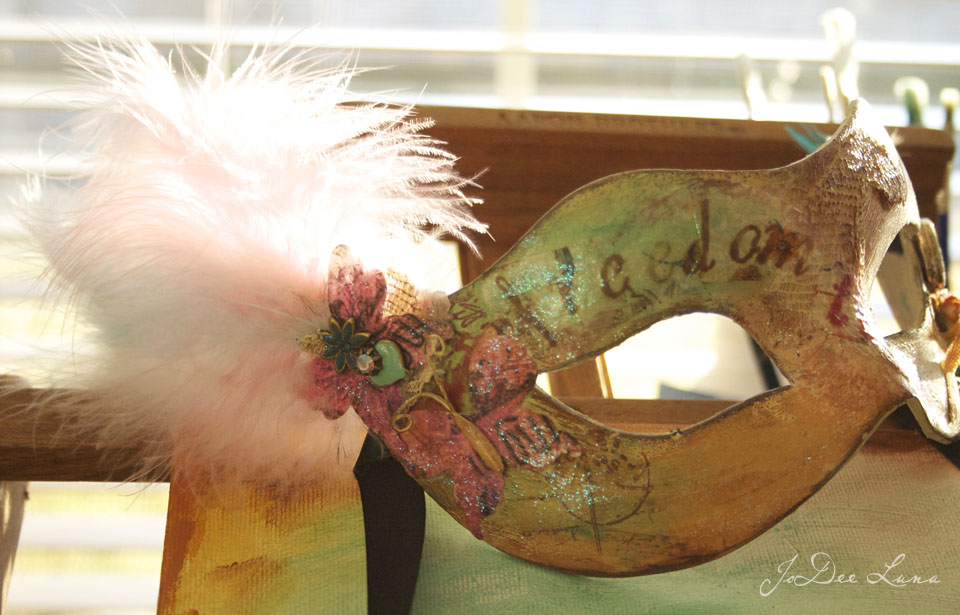
Soft and feminine yet brazen and bold; Hardly descriptors seeming to go together, except when you’re making a vintage, mixed media masquerade mask.

I’d envisioned a vintage mask for weeks. In fact, the concept captivated me because I love all things vintage—aged colors of yellow ochre and burnt sienna with a splash of aqua green; ink stamping and amber stones set in an antique heart. I could see the mask developing in my imagination.
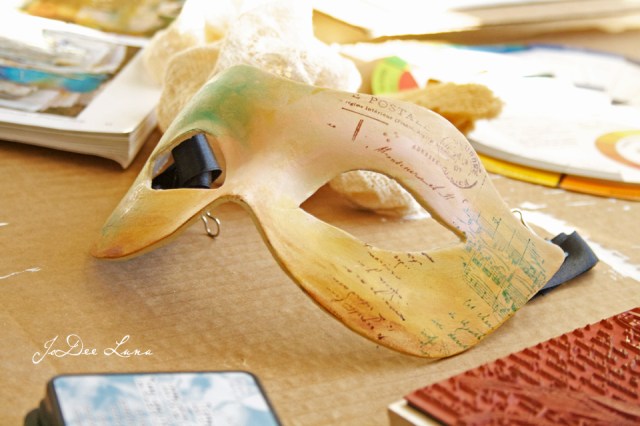
I started the project by gathering supplies and spreading them across the tables in my art room: a mask, acrylic paints, Golden Gel Medium, tea stained lace, butterflies, roses, hearts, ribbons, feathers, and some jewelry pieces.
Then I let my imagination run wild, while snapping photos to share with blog readers. So here are the steps to making a vintage, mixed media masquerade mask. Enjoy!
Check out this Mixed Media Mask-Making Essentials list on my Amazon Storefront for products I use. As an Amazon Associate, I earn from qualifying purchases.
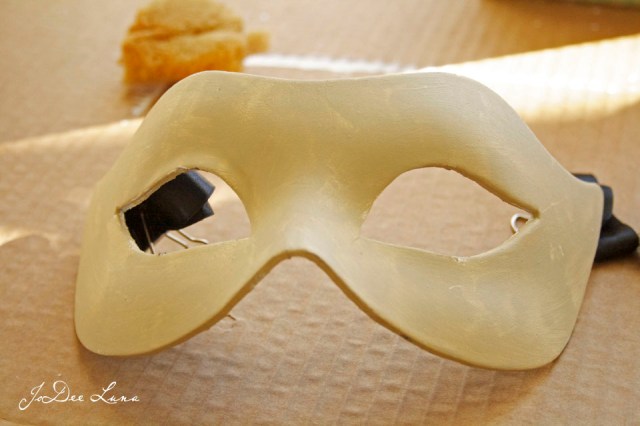
Step one: clip the ribbons out of the way and paint the mask Unbleached Titanium acrylic paint (Artist’s Loft)
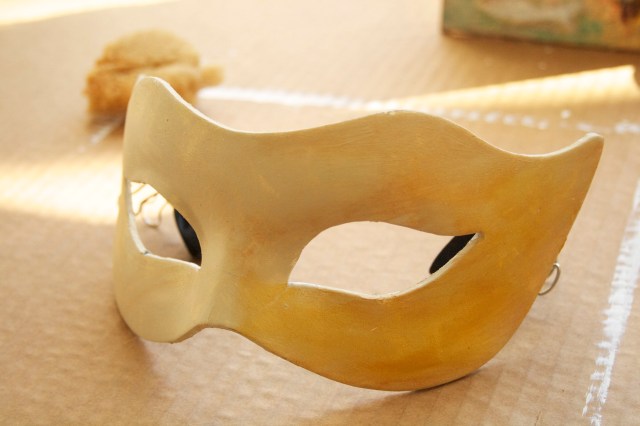
- Step two: use your fingers and/or a sponge to apply yellow ochre (Academy Acrylic).

- Fade the yellow ochre out so you can add other colors such as aqua green and light portrait pink (Basics).
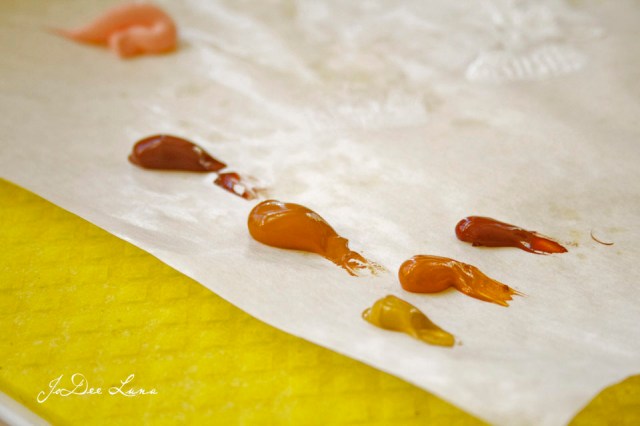
- Stamp the mask with Ranger Distress Ink by Tim Holtz: broken china, fired brick, and walnut stain. The stamps are from Hero Arts and Stampendous.
- Use a different color ink and stamp pattern with each color on the mask to create a vintage look.
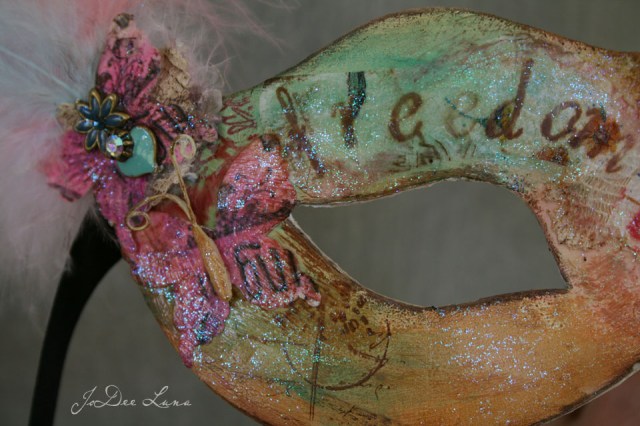
- Cut a piece of lace and use Golden Regular Gel (Matte) to glue the lace down and to cover the lace so you can Distress Ink later to create an aged look.

- Cut a heart out of plaster cloth, dip the heart into water, and rub the heart onto the mask.

- Stamp words on transparent or light paper and attach with Golden Gel Medium. Apply Distress Ink to the lace and heart and around the edges. Finally, cover with a glitter nail polish to add a magical sparkle.

- Add paper butterflies, feathers, and jewelry embellishments.
- Explore a variety of photo shoot situations as another creative outlet.
- Use lace or a light tablecloth, or hold the mask up outside so you can use foliage as a backdrop.
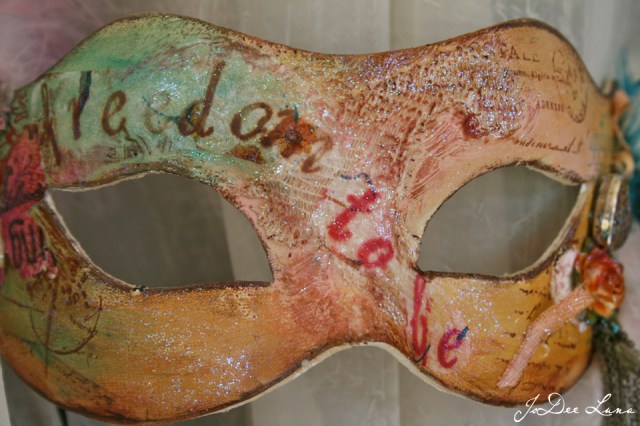
- Creating a vintage masquerade mask is a delightful way to spend a day. Each mask becomes a unique expression, depending upon the message and embellishments you use. Add to this, the enjoyment of taking photos of your mask. When you’re out shopping in art stores or garage sales, be on the lookout for embellishments for your masks. I collect odds and ends to add to my masks and other mixed media pieces.
Connect with JoDee around the web:
Visit my YouTube Channel Masquerade Masks Playlist for more inspiration.
Etsy Shop: https://www.etsy.com/shop/JoDeeLunaArt
Fine Art America Shop: https://fineartamerica.com/profiles/jodee-luna/shop
Facebook: https://www.facebook.com/RefrainFromTheIdentical/
Twitter: https://twitter.com/JoDeeLuna

I have also thought about making a mask.I really like the way you made yours.
LikeLike
Thank you for the complement. I guarantee you will really enjoy the process!
LikeLike